Loading...
> docs/quickstart
Quickstart Guide
3 min read
Getting Started
Last updated March 12, 2026
Before You Start
You need a ClawHosters account. If you haven't signed up yet, head to clawhosters.com and create one. The process takes about a minute.
New accounts include a free trial, so you can test things out before committing to a plan.
You'll also need to decide how you want to handle LLM access. ClawHosters includes free LLM access by default, or you can use BYOK mode (Bring Your Own Key) to connect your own API key from Anthropic, OpenAI, or another provider.
Step 1: Choose Your Billing Mode
After logging in, click New Instance in your dashboard. The creation wizard starts with billing mode selection:
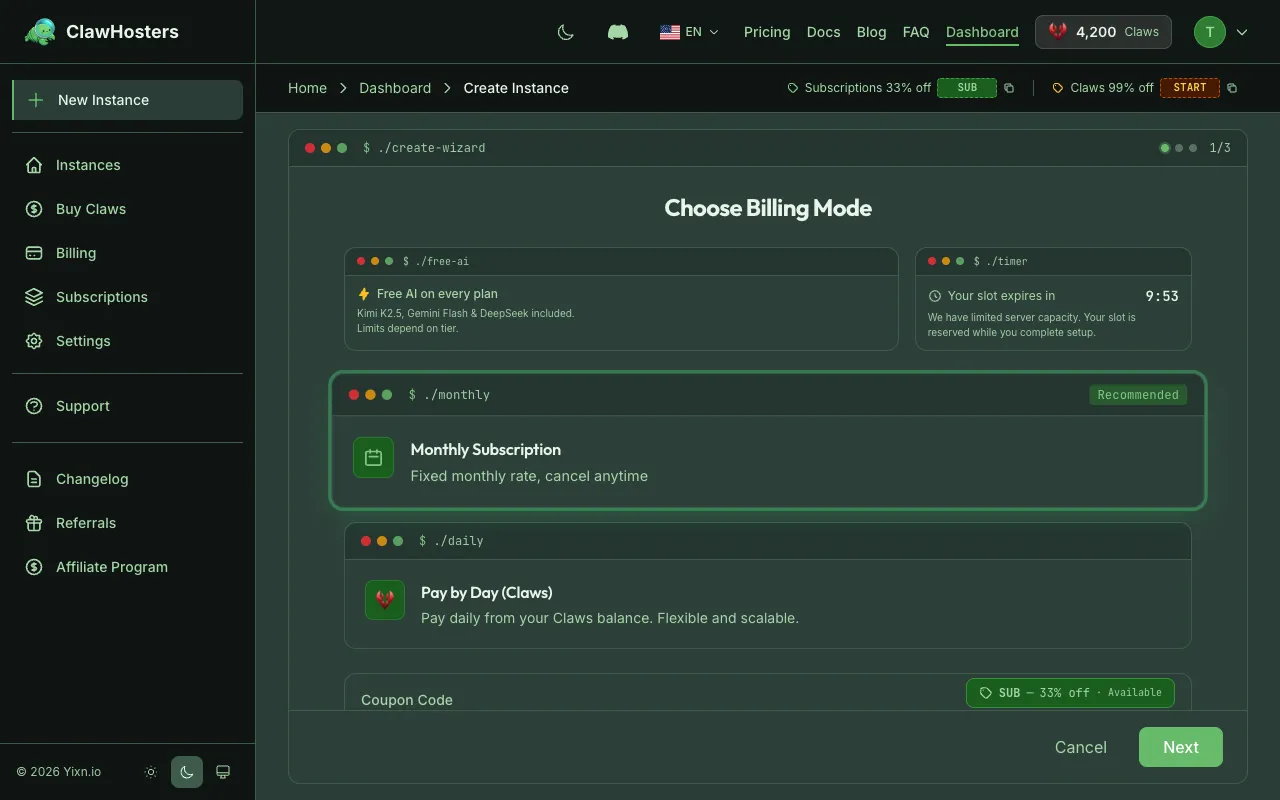
- Daily (Pay-as-you-go): Pay with Claws credits. Your instance runs as long as you have balance. Good for testing or irregular usage.
- Monthly Subscription: Fixed monthly payment via Stripe. Runs continuously with no interruptions.
Pick whichever fits your use case. You can always create additional instances with a different billing mode later.
Step 2: Select a Tier
Choose the server resources for your instance:
| Tier | vCPU | RAM | Storage | Monthly | Daily |
|---|---|---|---|---|---|
| Budget | 2 | 4 GB | 40 GB | €19/mo | 60 Claws/day |
| Balanced | 4 | 8 GB | 80 GB | €35/mo | 105 Claws/day |
| Pro | 8 | 16 GB | 160 GB | €59/mo | 175 Claws/day |
Budget works for most personal projects. Pick Balanced if you plan to handle higher traffic or need more headroom.
Give your instance a name. The wizard suggests one, but you can change it to anything you like. Choose carefully though, because instance names cannot be changed after creation.
Step 3: Review and Create
The summary screen shows your selected configuration and estimated costs. Review everything and click Create Instance.
- Daily billing: Claws are deducted from your balance. A one-time setup fee applies (150-450 Claws depending on tier).
- Monthly billing: You'll be redirected to Stripe to complete payment. Your instance provisions automatically after payment confirmation.
What Happens Next
Your instance typically provisions within 60 seconds. The process:
- A dedicated server spins up in a German data center.
- Security hardening applies automatically (firewall, container isolation).
- The OpenClaw container starts with your configuration.
- A health check confirms everything works.
Once provisioning completes, your instance status changes to Running. You can access it directly from your dashboard.
Connecting a Channel
With your instance running, connect a messaging channel to start interacting with your AI assistant:
- Telegram: Create a bot via BotFather, then pair it through the instance settings.
- Web UI: Access the built-in gateway interface directly at your instance URL.
Check the channel-specific guides in the documentation for step-by-step instructions.
Next Steps
- Configure your LLM in instance settings. Free LLM access is included by default, or connect your own API key (BYOK) for more control.
- Buy Claws if you're on daily billing and need to top up your balance.
- API Access: Generate an API key from your dashboard settings to manage instances programmatically.
Related Documentation
Creating Your First Instance
What You'll Set Up An instance is a dedicated server running OpenClaw, provisioned exclusively f...
What is ClawHosters?
Managed OpenClaw Hosting ClawHosters is a managed hosting platform for OpenClaw AI assistants. Y...
Instance Overview
What Is an Instance? An instance is a dedicated OpenClaw server running on ClawHosters. It is yo...
