Loading...
> docs/ssh-access
SSH Access to Your Instance
4 min read
Instances
Last updated April 05, 2026
Overview
SSH access gives you a direct terminal connection to the underlying VPS that runs your OpenClaw instance. This is intended for advanced users who need to debug issues, inspect logs, or make custom modifications.
Enabling SSH access marks your instance as Limited Support. Read this page carefully before proceeding.
Before You Enable SSH
Enabling SSH access has consequences for your support coverage:
- Your instance is marked as Limited Support
- You can still open support tickets, but we reserve the right to decline requests related to issues caused by manual server modifications
- You are responsible for any changes you make via SSH
- This change cannot be reversed
- Support for billing, account, and infrastructure questions remains fully available
Only enable SSH if you are comfortable managing a Linux server on your own.
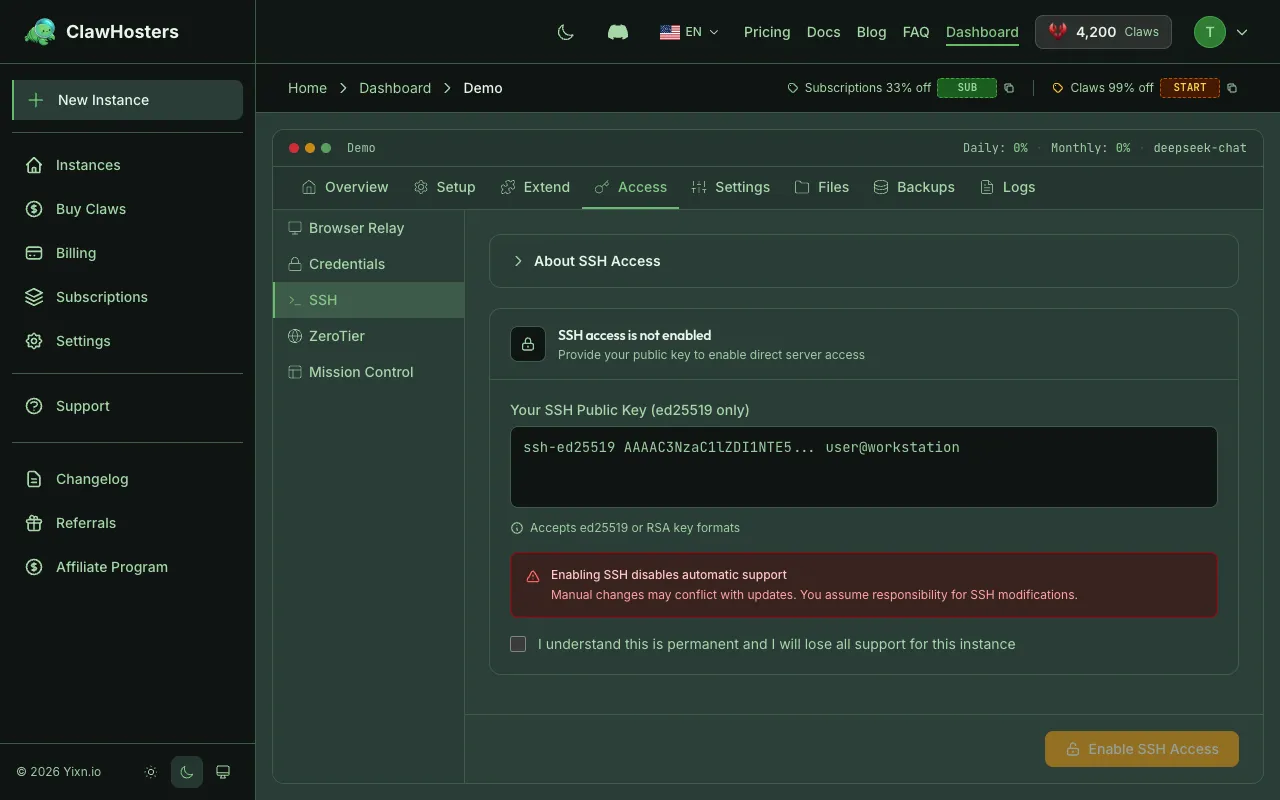
Enabling SSH Access
- Go to the Instance Dashboard
- Click SSH Access in the quick actions
- Paste your public SSH key into the text field
- Check the confirmation box acknowledging the support implications
- Click Enable SSH Access
Accepted Key Formats
ClawHosters accepts the following public key formats:
| Format | Example Prefix |
|---|---|
| Ed25519 (recommended) | ssh-ed25519 AAAAC3... |
| RSA | ssh-rsa AAAAB3... |
Paste the contents of your public key file (e.g., ~/.ssh/id_ed25519.pub). Do not paste your private key.
Generating a Key
If you do not have an SSH key yet:
bash
ssh-keygen -t ed25519 -C "your@email.com"
This creates two files:
- ~/.ssh/id_ed25519 is your private key (keep this secret)
- ~/.ssh/id_ed25519.pub is your public key (paste this into ClawHosters)
Connecting via SSH
After enabling SSH access, connect using:
bash
ssh -p 2222 -o StrictHostKeyChecking=no -o UserKnownHostsFile=/dev/null root@<ip_address>
Replace <ip_address> with the IP shown in your Instance Dashboard.
Connection Details
| Parameter | Value |
|---|---|
| Port | 2222 |
| User | root |
| Authentication | Public key only (no password) |
Password authentication is disabled. Only the SSH key you provided during setup is accepted.
Host Key Warning
Hetzner recycles IP addresses from deleted servers. If you rebuild your instance, or if your instance is paused/frozen and later resumed/unfrozen, the server's SSH host key will change. Your SSH client may display a warning about a changed host key.
To avoid this issue, use the -o StrictHostKeyChecking=no -o UserKnownHostsFile=/dev/null flags as shown in the connection command above. Alternatively, remove the old host key entry from your ~/.ssh/known_hosts file before reconnecting.
SSH Security
Key-Only Authentication
Customer SSH access is secured through public key authentication. The SSH daemon inside the container is hardened with the following settings:
- Password authentication disabled
- Only public key authentication allowed
- Root login allowed with key only (no password)
- Challenge-response authentication disabled
Since password login is completely disabled, only the SSH key you provided during setup can be used to connect.
IP Address Changes
Your instance's IP address changes when you pause and resume it, or when you freeze and unfreeze it. Both operations delete the current server and create a new one, which gets a different IP address. After resuming or unfreezing, check your Instance Dashboard for the new IP and update your SSH connection command accordingly.
The subdomain URL is updated automatically, but SSH connections use the IP address directly.
What You Can Do with SSH
Once connected, you have root access to the VPS. Common tasks include:
- Viewing container logs:
docker logs openclaw-<instance_id> - Checking container status:
docker ps - Inspecting resource usage:
htoporfree -h - Checking disk space:
df -h - Reading system logs:
journalctl -u docker
The OpenClaw application runs inside a Docker container. The container data is stored in the openclaw_data Docker volume.
What to Avoid
Making changes to the server can break your instance. Be cautious with:
- Modifying Docker configuration or restarting Docker
- Changing firewall rules
- Modifying SSH daemon configuration
- Deleting or modifying files in
/opt/openclaw/ - Stopping or removing the OpenClaw container
If something breaks, you can rebuild the instance from the dashboard, but custom changes will be lost.
Support Status
| Support Status | Meaning |
|---|---|
| Full | Default. Support team can assist with all issues. |
| Limited Support | SSH enabled. Support still available, but we may decline requests for issues caused by manual modifications. |
The Limited Support status is permanent and applies only to the specific instance where SSH was enabled. Your other instances retain full support.
Related Documentation
- Instance Settings and Configuration. LLM, messaging, web access, and SSH overview
- Starting and Stopping Instances. Power management and IP address changes
- Instance Overview. Instance lifecycle and statuses
- Troubleshooting Common Issues. Solutions for common problems
Related Documentation
Connection Issues
Diagnosing Connection Problems If you cannot reach your OpenClaw instance through the web UI, a ...
Docker Configuration
How Docker Is Used Every ClawHosters instance runs OpenClaw inside a Docker container on a dedic...
Authentication and Access Control
How Authentication Works in ClawHosters ClawHosters uses different authentication methods depend...
